
· by Michael Blair, Nashville's Closets
A lot of the houses built around Nashville since the 1990s were handed over with the same closet: one white wire shelf with a rod under it, running wall to wall. Many people who search for closet organizers in Nashville start with that shelf, usually because it has started to dip in the middle, tilt forward, or come away from the drywall at one end. The wire itself rarely fails. What fails is how it was fixed to the wall, and that matters whether you want the old shelf rehung properly or taken out for a fitted system. The manufacturer’s own installation documents are clear about what holds a wire shelf up, so we start there.
Why the shelf is sagging
A wire shelf is held two ways: clips along the back wall hold the rear edge, and angled brackets under the front lip stop it rolling forward. ClosetMaid’s wire shelving specification summary calls for a wall clip every 12 inches plus one at each end, and support brackets under the front at 36-inch spacing plus one at each end. It also says the bracket should match the shelf depth, so a 16-inch shelf with a rod beneath it takes a 12-inch bracket. When a builder’s crew spaces the clips farther apart, leaves out the middle bracket on a long wall, or uses a bracket that is too short, the front of the shelf drops and the rear clips are levered out of the wall.
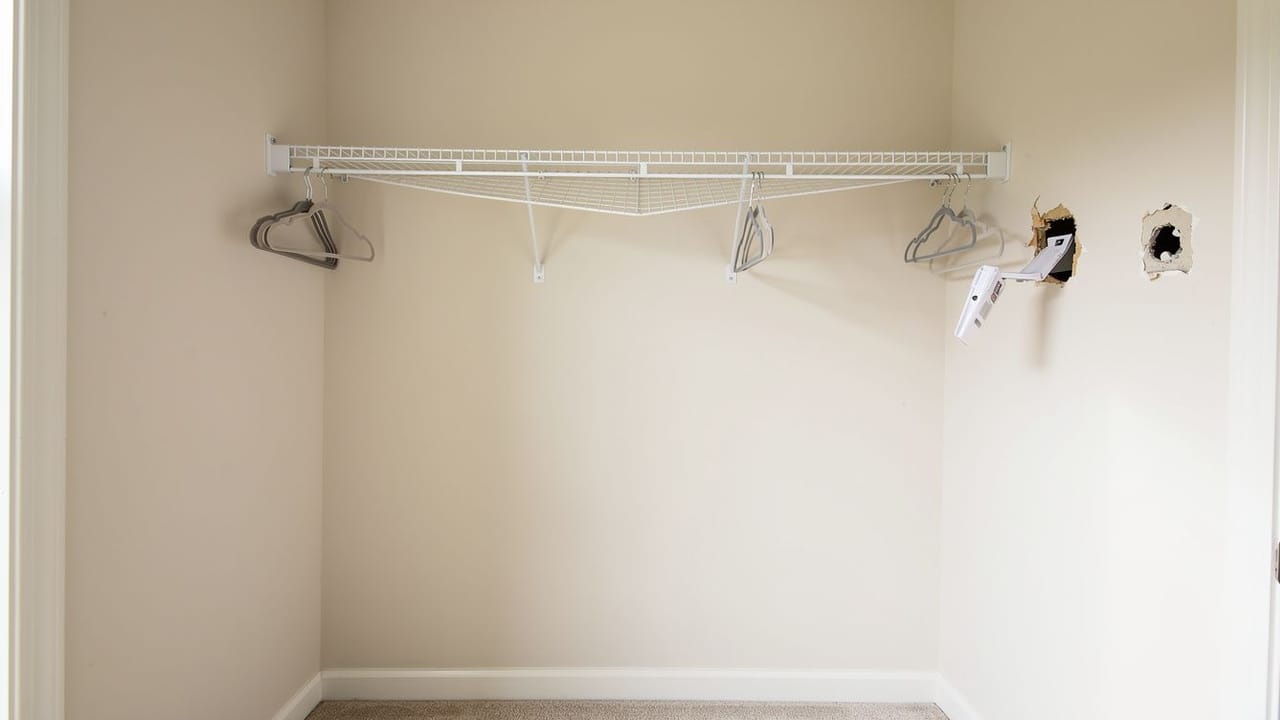
The other common cause is the anchor. The same document says toggle bolts are for drywall and that a stud installation uses a #8 by 1-1/4 inch pan head screw. In a closet the support brackets often land between studs, and a fastener that was meant for wood holds very little in half an inch of gypsum. Add a winter coat collection and a row of storage bins on top, and the hole slowly widens until the bracket swings loose. The torn drywall left behind is the first thing we look at, because it tells us which fixings have already given up.
What the installation documents ask for
ClosetMaid’s specification for its fixed mount wire system is written for installers and is more exact than the box. In drywall, the wall clip goes into a quarter-inch drilled hole and is expanded with a #8 by 1 inch pin while the clip is still unloaded; in wood, the clip is fastened with a #8 by 1 inch screw. Holes are to be drilled with a sharp bit, not punched. Shelves are cut between half an inch and 1-3/8 inches shorter than the wall, and the cut ends are capped. Before any of that, the installer is to confirm that the framing, any reinforcement and the anchors are the right type and in the right place, and not start until a problem is fixed.
That last step is the one most often skipped in a new house, where closets are among the last things fitted. The sheets we read are dated 2012 and 2016, and a current product sheet may differ in its details, but the way they describe fixing a shelf to a wall is the part that matters here. Note what they do not say. Neither gives a load rating for a shelf or an anchor, so we do not quote one, and you should be wary of anyone who promises a number without saying what it is fixed to.
- Wall clips every 12 inches along the back, and one at each end
- Front support brackets at 36-inch spacing, and one at each end
- A bracket sized to the shelf depth
- Toggles in drywall, screws into wood, drilled holes rather than punched
- Framing and anchors checked before anything is hung
Rehang, track, or replace
Once we know what is holding the shelf and what is not, there are three honest routes. If the shelf is sound and the problem is fixings, it can be taken down, the old holes patched, and the shelf rehung with the clip and bracket spacing the maker asks for. That is the cheapest fix, and it leaves you with the same single shelf and rod you had before, just level.
The second route keeps wire but changes how it hangs. ClosetMaid’s adjustable mount specification describes its ShelfTrack system: a hang track along the top of the wall, vertical standards no more than 24 inches apart and no more than 4 inches from each end of the shelf, and brackets that let you move a shelf at any time. Because the standards carry the load down the wall rather than relying on a clip every foot, the placement of those standards is the whole job. Our post comparing DIY closet kits with a fitted system covers when a track kit is enough.
The third route takes the wire out and replaces it with built shelving, drawers and double hang sized to the clothes. That is what most of our reach-in closet work is: the single rod and shelf removed and the wall used from floor to ceiling. It also means every old clip hole has to be filled and the wall painted, since a fitted system will not hide all of them.
What to check before you replace it
Before a builder shelf comes out, we find the studs on each wall and mark them, because a fitted system is hung from a rail that has to catch framing, and closets are often framed around a duct chase, a plumbing wall or an attic hatch that moves the studs from where you expect them. We look at how many holes the old shelving left and how badly the paper face is torn, since a wall full of pulled anchors needs patching before anything new can be hung flat. We note the light fixture, the switch and any outlet, because a new top shelf may sit higher or lower than the old one.
Then we look at what the closet is asked to hold. A builder shelf is designed for a fixed load spread along one line; a closet that now holds suitcases, a printer and three seasons of clothes is a different job, and the answer may be drawers low down and less on the top shelf rather than a stronger version of the same shelf. Whichever route you take, the fix that lasts is the one made around the wall behind the shelf, not the shelf itself. If yours has started to pull away, our Nashville closet page shows the area we cover, and the free estimate form is the way to have us look at it.
Sources
- Simpson Strong-Tie, Make Sure Wall anchoring solutions (Strong-Tie blog, September 30, 2026) — Where there is no stud, the load rests on the drywall itself, which is softer and more brittle than wood.
- ClosetMaid, Wire Shelving Specifications: Summary of Key Components — Wall clip every 12 inches, front brackets at 36-inch spacing, bracket depth, toggle bolts in drywall, #8 pan head screw into studs
- ClosetMaid, Fixed Mount Hardware System, Section 10 57 23.14 — Drywall clip installation, cutting shelves short of the wall, drilling not punching, checking framing before installation
- ClosetMaid, Adjustable Mount Hardware System, Section 10 57 23.13 — ShelfTrack standards no more than 24 inches apart and 4 inches from each shelf end